Videographer and Video Editor in New York City
Videographer and Video Editor in New York City
in New York City
in New York City
Video Editor
in New York City
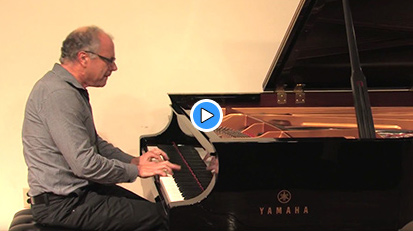
The selected venue must have a relaxed and pleasant environment, have excellent acoustics, and should be visually appealing. If you are a pianist, confirm that you will have access to first-class pianos with an on-site technician. Make sure that the venue allows you to bring your own audio engineer with his or her own audio recording equipment. Your audio engineer and the equipment that he or she uses will have a significant impact on the recorded audio quality and cost of your recording.
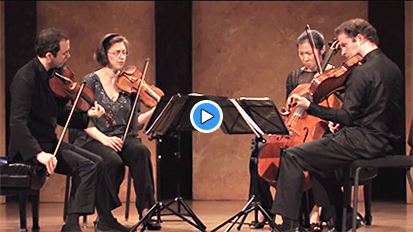
Video and audio production, which involves filming with multiple cameras and professional audio equipment, is the key to achieving the audio and video quality that you desire.
Because most venues blll at an hourly rate, it is important that you decide in advance how many hours of recording time you will need to cover the music being performed and to correct any mistakes.
The best and most efficient way to reduce the number of hours spent in the venue is to be well-prepared. One way to ensure you are ready
is to schedule the recording sessions soon after you have performed your concert. This way, your performance is already
well-rehearsed, and you reduce the amount of time necessary to spend in the venue correcting mistakes.
If you want some control over the editing process,
selecting your best takes ahead of time and submitting them to your editor will reduce your editing cost.
If you do not have the time or energy to review the footage yourself, allowing an editor to use his or her best artistic judgment is also an option. Because editors often bill on an hourly rate, it is important to choose (if possible) an editor with a musical background. An editor who understands the music can choose for you the best takes, combine them into a single performance, and create for you the recording master
quicker and more seamlessly than an editor without a musical background.
Minimizing your interaction with the editor over editing choices with which you are not satisfied saves you many hours of editing time and reduces the cost of editing.
The edited master is encoded either to DVD or Blu-ray, which becomes your final disc master. The disc can contain multiple menus, allowing the viewer to select certain portions (chapters) of your performance, as well as bonus features, such as an interview featuring yourself or other information you'd like to add on the disc.
The fourth step is to design the artwork for your DVD or Blu-ray Disc case and manufacture the discs to your desired quantity. The artwork includes the wraparound cover as well as the actual disc face label. In addition to that, you can also add an insert which can highlight all the chapters (tracks) on the disc. Because the price range for designing artwork varies greatly, I suggest that you ask your graphic designer to quote you a flat rate for the design. Do not agree to hourly rates, because you may end up paying much more than you budgeted for.
The fifth and final step is to sell your DVD or Blu-ray Disc on Amazon. Amazon provides individual seller accounts, order fulfillment, and distribution of your title. Amazon charges a commission rate plus a flat fee, in addition to the fees it charges to store your records in their warehouse, which is calculated by weight. Click here for more detailed pricing information regarding Amazon's costs.
There are two methods that are involved in manufacturing discs - duplication and replication. Duplication is more suitable for those that need lower quantities, which helps reduce cost.
These discs are manufactured using computer disc burners. Replication is more suitable for commercial release and has a minimum requirement of 1,000 copies.
These discs are manufactured from a molding machine and offer higher compatibility with disc players. Click here to learn more about the different methods.
66 Overlook Terrace #3E, New York, NY 10040
Studio: (646) 505-0706 | Mobile: (917) 715-8755 | Email: asaf@asafblasberg.com | Top of Page↑
66 Overlook Terrace #3E
New York, NY 10040
Studio: (646) 505-0706
Mobile: (917) 715-8755
Email: asaf@asafblasberg.com
Top of Page↑
66 Overlook Terrace #3E
New York, NY 10040
Studio: (646) 505-0706
Mobile: (917) 715-8755
Email: asaf@asafblasberg.com
Top of Page↑

